|
|
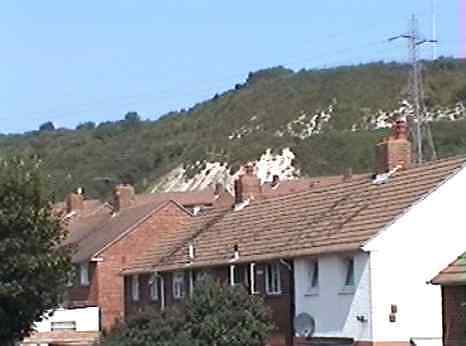
The chalk slope just above the rooftops is the spoil
from the construction of the Victorian Forts during the 1860s, and is a
well known Portsmouth landmark The escape tunnel access road can just be made out 1/3 of the
way down the photo. Beyond the top of the hill is Fort Southwick
|
|
| |
| |
| |
|
|
On
top of Portsdown looking East, at the top of the tunnel
approach road (which is to the right of the camera).
Fort Southwick is on the left. The modern building on the right
sits directly over the tunnels. This was formerly the Flag Officer
Fleet 3 (FOF3) building.
|
|
| |
| |
| |
|
|
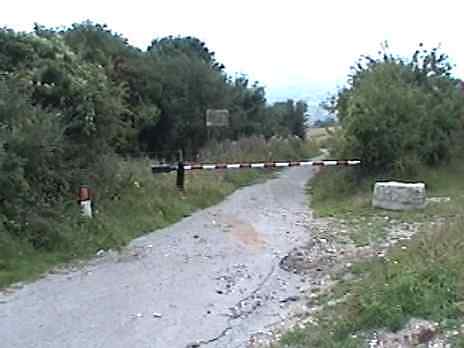
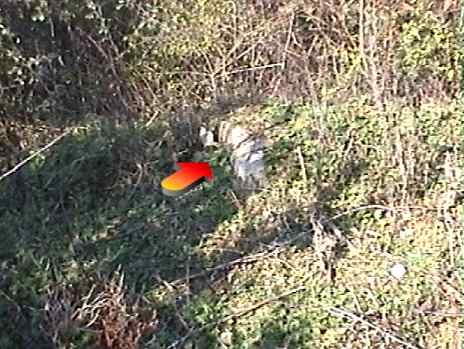
This
is the access road to the tunnel entrances below Fort Southwick.
It is a few hundred yards West of Fort Southwick itself. It leads
to a high fenced enclosure, where just before this, buried in the
undergrowth, is a partly demolished brick built guard house.
|
|
| |
| |
| |
|
|
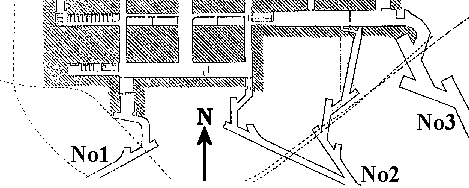
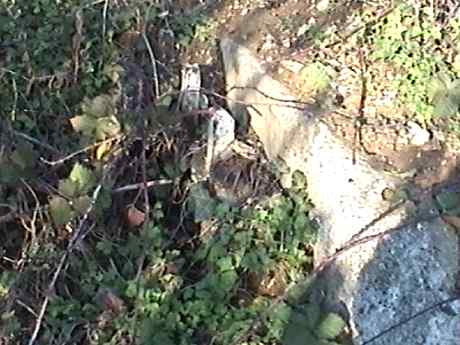
This
is the No1 portal inside the compound (EE1
on the plan), when counting from West to
East. It has been almost totally covered over with earth and
chalk, but has become exposed due to settling and
erosion.
|
|
| |
| |
| |
|
|
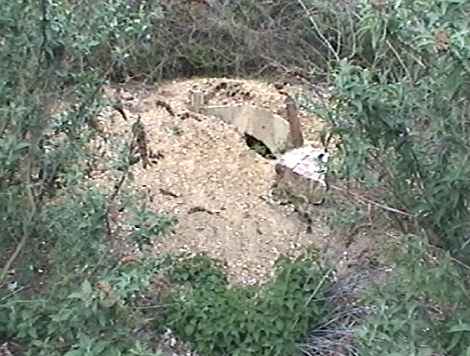
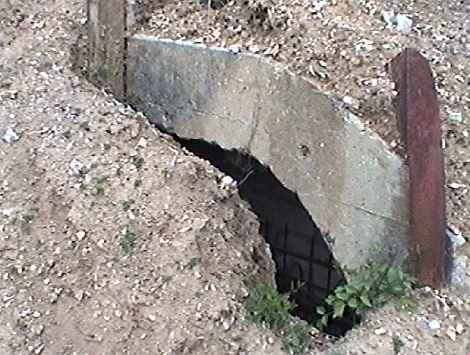
No1
portal close-up. (EE1
on the plan) In the centre of the picture the
spikes on top of the original gate can still be seen. This is the
style of gate that I remember from the sixties.
|
|
| |
| |
| |
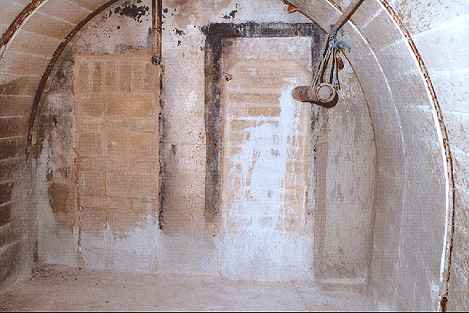 |
| This
shows how the western escape adit (EE1 on the plan)
has been blocked off. The doorways have been blocked-up and then
concrete has been pumped into the tunnel via the pipe on the top
right. |
|
|
| |
| |
| |
|
|
Portal
No2, (EE2 on the plan)
which again has been back-filled and covered over. Unlike
portal No1 however, the gate is missing. The 2 tunnels have been
rubble filled near the outer end and and pumped full of concrete
further back.
|
|
| |
| |
| |
 |
|
No
2 portal close up. Someone has had a go at digging this out, but
has soon realised that the entrance was sealed with concrete
blocks reinforced with steel. The tunnel itself has also been
pumped full of concrete.
|
|
| |
| |
| |
 |
|
No2
tunnel splits into 2 sections and this is the view of the west
section inside the UGHQ which was used as an escape route (109 on
the plan). Again it has been pumped
full of concrete.
Photo:
Jan West
|
|
| |
| |
|
|
|
|
|

|